LogicalDOC Export

The LogicalDOC Export is a standalone application designed to extract a LogicalDOC's folder and the entire tree below into a plain local file system path.

Install LogicalDOC Export

Get the installation file from the download website. To install LogicalDOC Export unpack the zip archive then open a terminal window and execute the command from command line:

$ java -jar logicaldoc-export-installer.jar

During the setup you will be required to input the connection parameters to your LogicalDOC installation as well as the remote folder to monitor and the local target path.

On Windows, after the installation you will have a new Windows service and in the status bar a new icon will appear.

On Linux you can start / stop the tool with this command:

$ export.sh start / stop

Once launched, it will stay resident as a daemon and synchronizes the remote changes with the target file system folder.

Configuration

The installer configures the export tool with common settings, but you can change them at any time by editing the configuration file located at <Export_Home>/conf/context.properties:

EXPORT SETTINGS
Parameter Description
url The address to reach LogicalDOC
username The username to access LogicalDOC
password The password to access LogicalDOC
source Unique identifier of the remote folder to monitor
target Full path of the local folder that will receive the export
versioning true = all the versions are exported;  false = just the last version is exported
filealias true = file aliases are exported;  false = file aliases are skipped
failonerror true = the export stops if there is an error;  false = errors are tolerated
errors.file When failonerror is false, the IDs of the failed documents are written to this file
lastproc.file this file contains information about the last event processed
schedule.delay.Exporter start-up execution delay (in milliseconds)
schedule.interval.Exporter number of milliseconds between elaborations (in milliseconds)
schedule.length.Exporter maximum duration of a single elaboration expressed in seconds
schedule.mode.Exporter accepted values: simple or advanced
schedule.cron.Exporter used in advanced mode, it is the execution string in cron format (ss mm HH DD MM DW)
More info at Cron Trigger Tutorial
 

Every time you modify the configuration file, remember to relaunch the application.

Log of the application

The export tool sends its output to the console. It also creates execution log files in the logs folder. Inside this folder, the system will write the log of the export activities.

Archive Viewer

The system provides to you the Archive Viewer application. It allows you to verify any archive finalized by the system. This application has three functionalities:

  • Verify: archive verification
  • Browse: listing of all documents inside an archive
  • Search: among documents into the archive

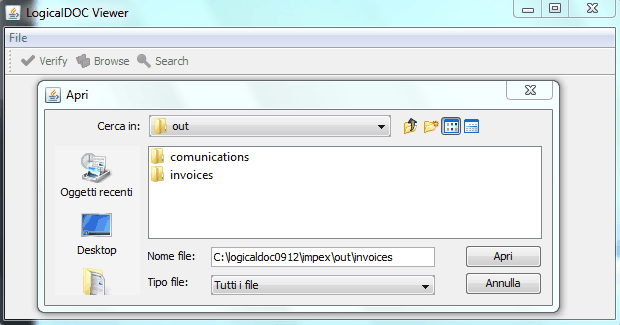
After launching the application, you must click on File > Open and search the archive folder. This folder can be in an hard disk area or into a CD / DVD.

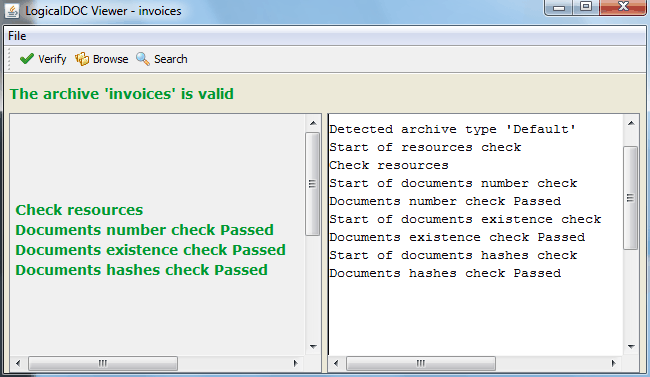
If has been selected a correct folder, you can check the archive by clicking on Verify. Then compares a summary screen that has two columns: at the left one there is the list of the steps that were completed during the verification. If these steps are all in green colour, it means that the archive is valid. Even if only one of them is red, then the archive is invalid. On the same screen on the right column it is shown the report of the verification procedure in which are specified correctly and precisely all the problems.

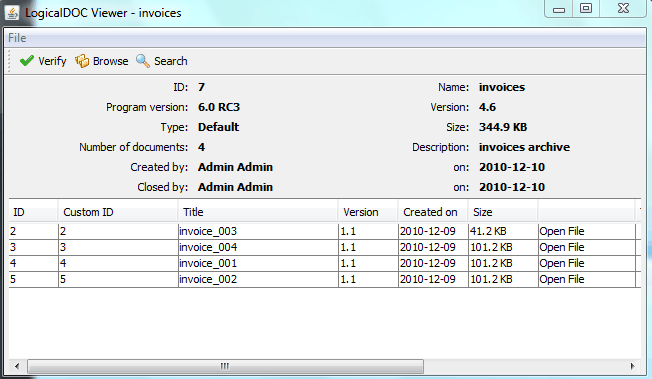
Another feature is the display of the list of documents in an archive by clicking on Browse. In the top of the screen there are the archive informations, while below there is the table of documents similar to document list table inside the system. By default, the maximum number of records displayed is 1000, but this value can be changed in the search page. If the number of documents in the archive is greater than the value set on the search page, a notification message is displayed to you. For each file, clicking on any field in the table, opens a small popup that displays the details of the selected document. Instead, clicking on Open File, you can view the contents of the document.

Another feature is the search among the documents of an archive by clicking on Search. You simply have to add and remove a search condition applicable to all possible metadata of a document similar to the parametric search inside the system. In particular, you can change the maximum number of documents to be displayed on the listings page.

Import Archives

Into the [Import Archives] panel you can configure the import from archives.

Import Archives

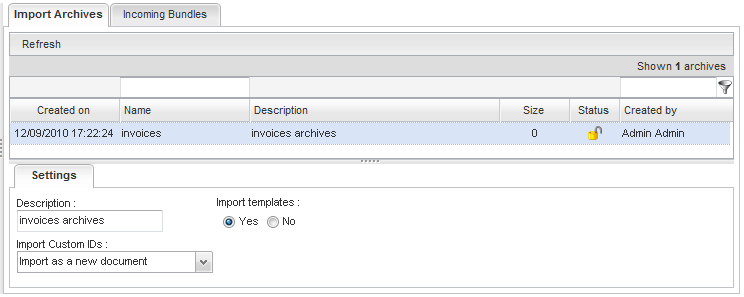
Into the [Import Archives] tab you can see all the archives already imported or that are still waiting to be imported into the system. For each archive, are showed the following informations:

  • Creation date
  • Name
  • Description
  • Number of documents
  • Status
  • The user that has created the archive, that can be different from the user that has imported the archive.

Initially the archives are in the Opened status and ready to be imported by the scheduled task Archive Importer: for each archive, the task verifies if it is valid, sets its status to Closed and starts the import of documents. At the end, if no errors have occurred, the archive goes to the final status Finalized. If, instead, you want to delete an archive, right click on the item and select [Delete].

Selecting an archive item, you can see its details and settings that you can modify:

  • Description
  • Import templates: whether or not to import all templates that are not currently stored into the system and which are associated with one or more documents to be imported. If you choose to not import the templates, the documents will be associated with default template.
  • Import Custom IDs: the import policy regarding the documents custom IDs:
  • Ignore: the documents custom IDs are not imported, then the system will create a new custom ID for each document according to the associated template.
  • Import as new release: if an importing document has the same custom ID of a document already stored into the system, then the system generates a new release of that document with the metadata of the document to be imported.
  • Import as new subversion: if an importing document has the same custom ID of a document already stored into the system, then the system generates a new subversion of that document with the metadata of the document to be imported.
  • Import as new document: if an importing document has the same custom ID of a document already stored into the system, then the system generates a new document with a new custom ID.

Incoming Bundles

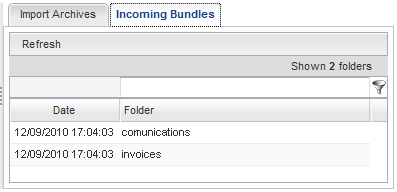
Into the [Incoming Bundles] tab is showed all the bundles that you want to import. You have to insert this folders into <repository>/data/impex/in, the system recognizes the new folders and shows them on the list. After that, right click on the bundle item and then select [Import this bundle]: the system creates a new import archive, that you can see into the list on the first tab [Import Archives]. If, instead, you want to delete a bundle, right click on the item and select [Delete].

NOTE: If, during the execution of the scheduled task Archive Importer some errors occur, the archive doesn't go to the finalized status, but goes to an error status and to the archive item is associated an error icon. Into the log file of the scheduled task, you can see all the occurred errors.

NOTE: For each archive into the [Import Archives] list you can modify the archive settings, but when the scheduled task starts to import the documents, the settings cannot be modified.

NOTE: The imported documents are not immediately indexed. So you have to wait the scheduled task Documents indexing.

Export Archives

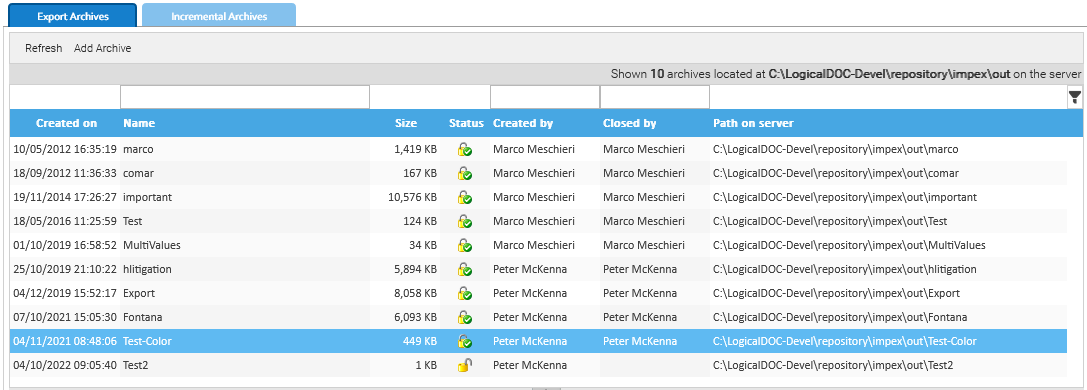
This panel displays the list of all archives previously created with the following information:

  • Creation date
  • Name
  • Type
  • Size
  • Status
  • User that has created the archive
  • User that has closed the archive
  • Path on the server where the archive has been created

Initially, the archives are opened.

To add a new archive, you have to click on Add archive button, and then you have to specify a name and a description.

When you decide that the archive must be inserted into an optical support, you can finalize the archive. First, you must close the archive, so right-click on the item and then select Close. Now the archive is ready to be exported. At the end of the scheduled task, Archive Builder the archive goes to the final status of Finalized and is ready to be copied into any optical media.

Note

If, during the execution of the scheduled task Archive Builder some errors occurs, the archive doesn't go to the finalized status, but goes in an error status, in fact, in correspondence of the archive item appears an error icon. Into the log file of the scheduled task, you can see all the errors occurred.

You can delete an archive by right-clicking the item and then selecting the Delete context menu item.

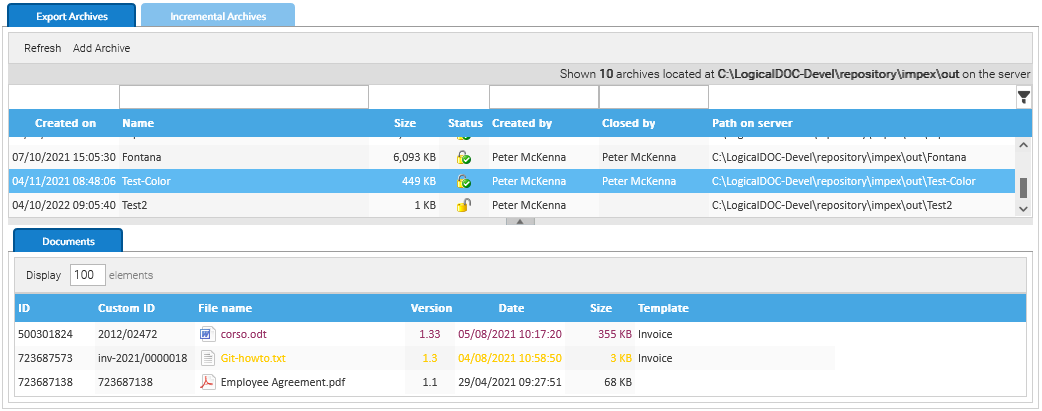
Selecting an archive item, you can see all the documents inserted into the archive.

Note

You can delete one or more documents only if they are inside an opened archive. In a closed archive, documents cannot be deleted because the archive is waiting to be finalized.

Incremental Archives

You can create archives of documents asynchronously through the scheduled task Incremental Archives. In this tab, you can set the features and the details of an incremental archive.

To add a new archive, you have to click on Add incremental config button. Each archive must have a prefix, and you must set how often (frequency, in days) the system must create the archives. You can select in which folder, within the documents archive, will be searched for documents and can define the templates to which these documents will be associated.

Note

Among all the documents in the selected folder, only those that were not previously inserted in any archive will be included in a new archive.

Email Accounts

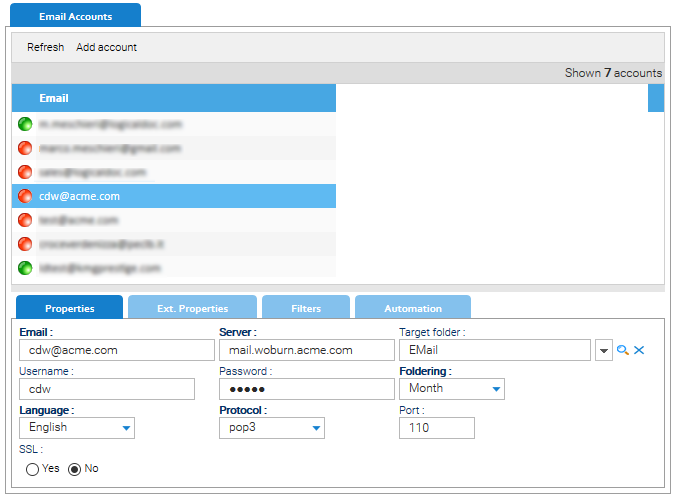
The system can store emails and their attachments by downloading them from remote email accounts. You can configure a number of email accounts so  that they will be regularly inspected by the system searching for new posts to be imported as documents.

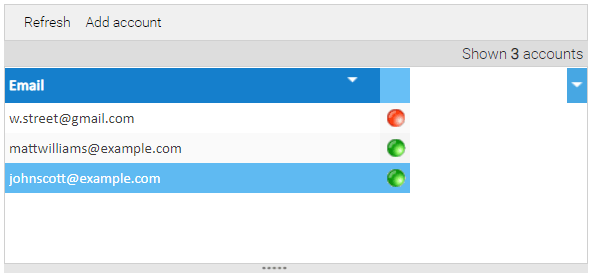
In this panel you can see the currently existing accounts.

To add a new account, you have to click on Add account button. These are the standard Properties:

  • Email account
  • Server Host
  • Username (optional)
  • Password (optional)
  • Target: the folder inside the documents archive in which to save documents
  • Language: language associated to the documents that will be imported
  • Protocol: POP3 or IMAP. In the case of IMAP server is possible to specify the folder from which will be retrieved the e-mails

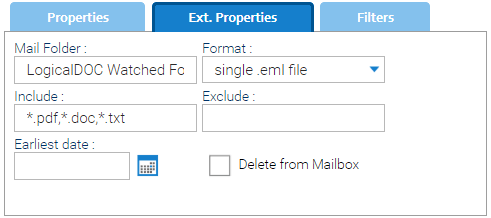
It is possible to specify other settings (tab Ext. Properties) to control other aspects of import, in particular:

  • Mail Folder: in case of import with IMAP protocol it is possible to specify the import source folder
  • Format: you can import the email divided in multiple files or import as one single .eml file
  • Include: contains a comma-separated list of extensions, defining the only types of attachment that can be downloaded
  • Exclude: not allowed extensions (comma-separated list)

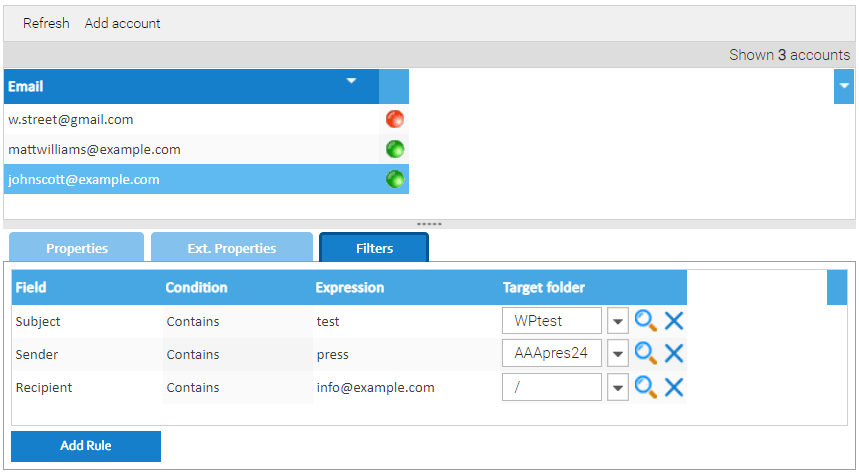
Into the Filters tab, you can set one or more email filters. So you can specify a folder inside documents archive in which will be stored all the emails that match the filter.

Note: Only active mailboxes will be inspected at regular intervals by the scheduled task Email Download.

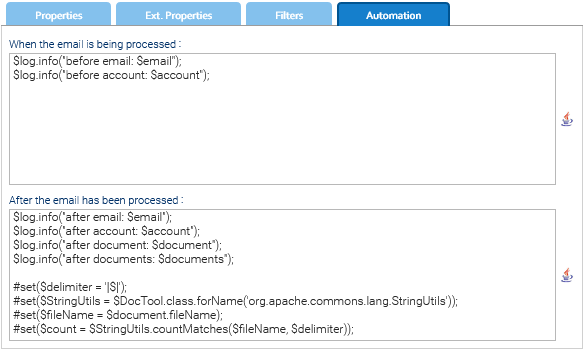
Into the Automation tab you can write your automation procedure that will be invoked at each import passing the email variable.

Dictionary available for the Automation in this context

AUTOMATION CONTEXT: EMAIL IMPORT
VariableJava ClassDescription
emailEMailthe email being imported
accountEmailAccountthe account from which the email is being imported
messagethe message representation as returned by the mail server
documentDocumentthe document that will be used to save the email in the repository
documentsDocumentlist of documents that will be used to save the email and it's attachments in the repository

Read the Automation manual for more information.