")
")
")

Before you begin
Before you begin, you need to generate encryption certificates for encrypting the SAML connection and load them in LogicalDOC
- You can use the Bash script from the logicaldoc/scripts repository on GitHub, or any other suitable method.
- Save the two files that are generated. They are the private key and the public key. In the SAML settings panel, they are referred to as the SP Private Key and the SP Certificate respectively.
You also have to make sure to use LogicalDOC over HTTPS because ADFS will not accept a plain HTTP Relying Party.
Prepare LogicalDOC
- Enable the SAML Single Sign-On in Administration > Security > SAML Single Sign-On
- In the SP Entity ID field put a unique identifier(you may put here the same URL you normally use to connect to LogicalDOC, eg https://localhost:8443)
- Enable both the signature of the AuthnRequest messages and the encryption of received assertions.
- Choose SHA-256 as Signature algorithm.
- Upload the SP Certificate and SP Private Key generated before, in the correspondent fields.
- In the Attribute mappings form, prepare following mappings:
- In Username, type username
- In First Name, type firstName
- In Last Name, type lastName
- In Email, type email
- In Groups, type groups
Click on Save to confirm all the configuration.

- Export the Service Provider metadata file by clicking on the URL displayed in the SP Metadata field. You will then use this file in ADFS later.
Now you completed the LogicalDOC's configuration and can approach the setup of ADFS.
Prerequisites
- An Active Directory instance where all users have specified email and username attributes.
- A running Microsoft Server.
- An SSL certificate to sign your ADFS login page.
- ADFS installed on your Microsoft Server. You can find a detailed guide for deploying and configuring ADFS in this article.
On your ADFS installation, open the ADFS console. Select Service, then select Endpoints. In the Type column, search for SAML 2.0/WS-Federation and note down the value of URL Path column. This is also known as the SAML SSO URL Endpoint in this guide. If you chose the defaults for the installation, this will be /adfs/ls
Add a relying party trust
-
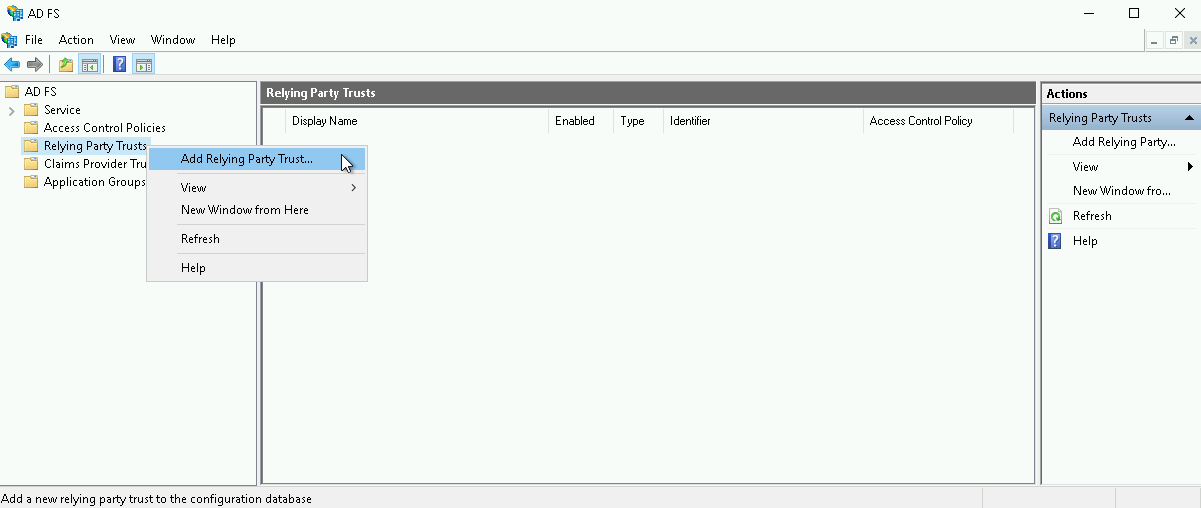
Open the ADFS management snap-in, then select AD FS > Relying Party Trusts > Add Relying Party Trust from the right sidebar. You can also right-click Relying Party Trusts, then select Add Relying Party Trust from the context menu.
-
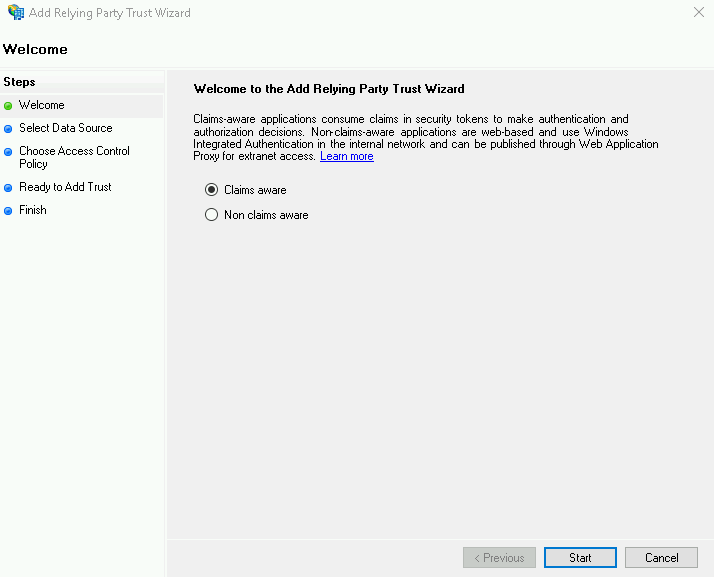
On the Welcome screen of the configuration wizard, select Claims aware, then select Start.
-
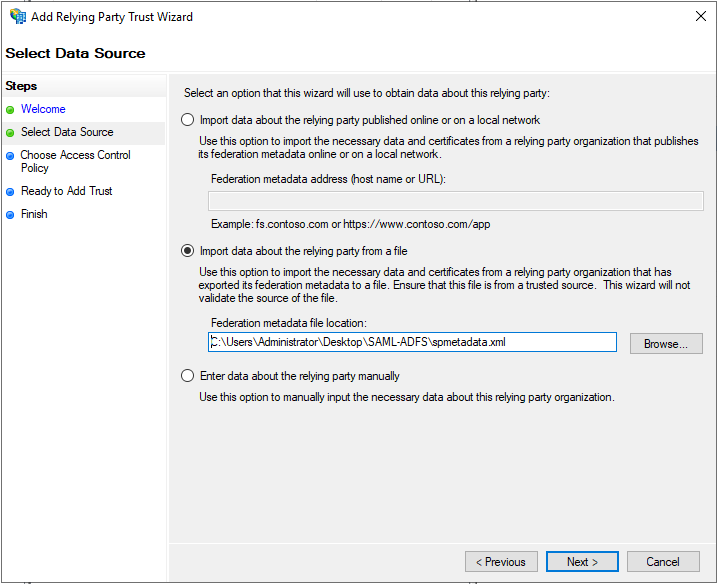
On the Select Data Source screen, select Import data about the relying party from a file. Choose here the same metadata file obtained in the step 7 of LogicalDOC's preparation.
-
On the Specify Display Name screen, enter a Display Name (e.g., LogicalDOC). You can add optional notes.

-
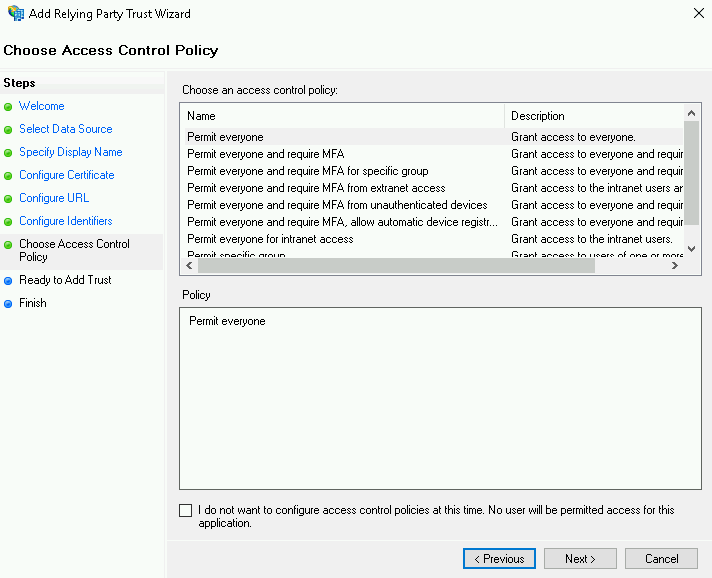
On the Choose Access Control Policy screen, select the access control policy suitable for your environment. This guide assumes the default values Permit everyone.
-
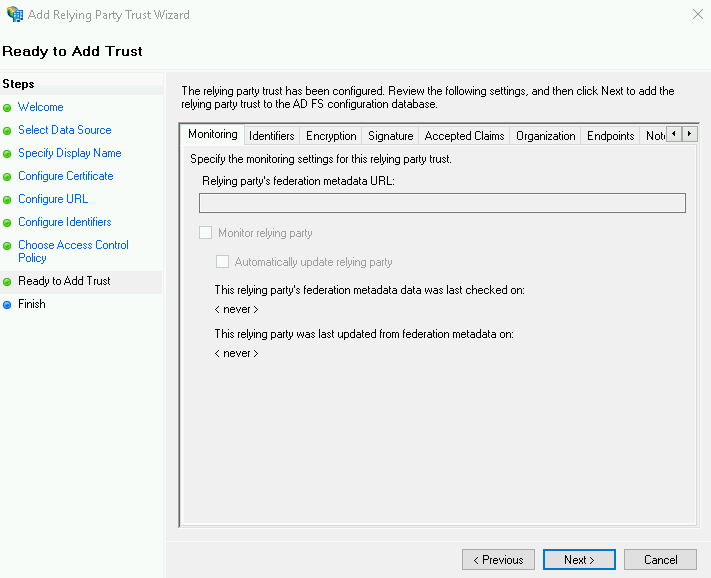
On the Ready to Add Trust screen, review your settings.
-
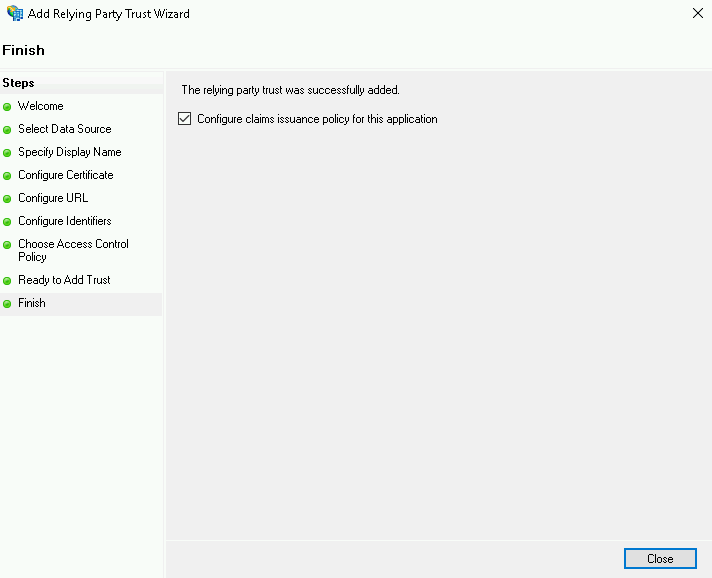
On the Finish screen, select Configure claims issuance policy for this application, then select Close.
Create claim rules
-
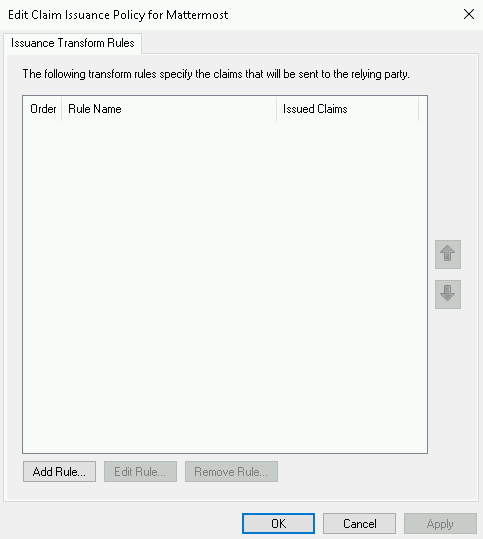
In the Issuance Transform Rules tab of the Claim Rules editor, select Add Rule….
-
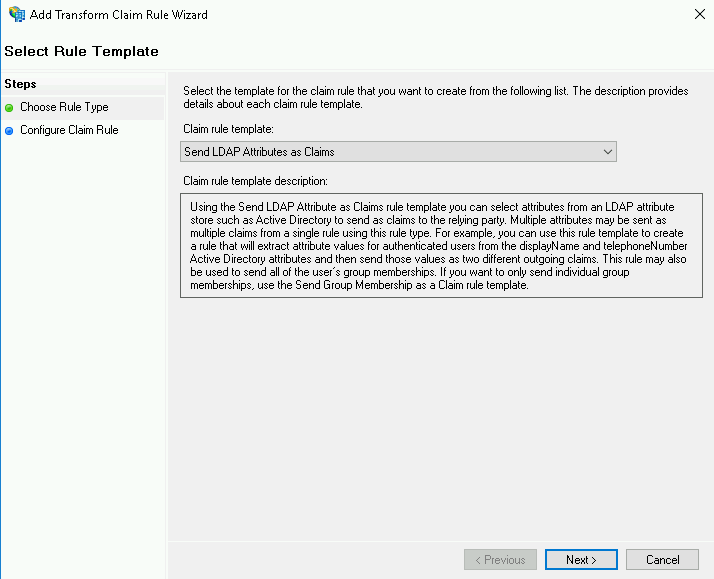
On the Choose Rule Type screen, select Send LDAP Attributes as Claims from the drop-down menu, then select Next.
-
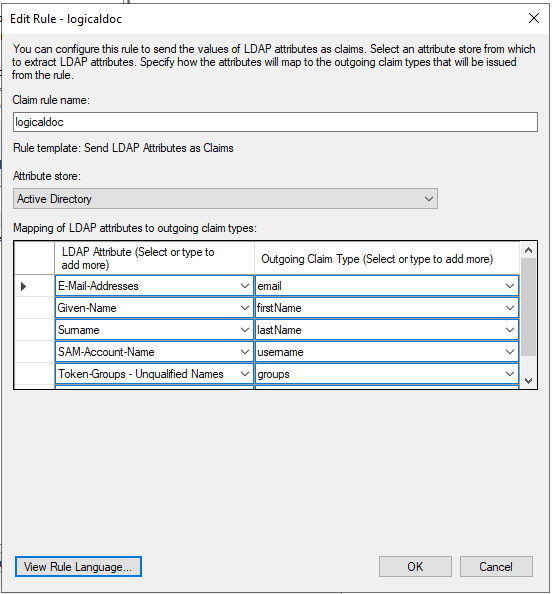
On the Configure Claim Rule screen, enter a Claim Rule Name of your choice (eg: logicaldoc ), select Active Directory as the Attribute Store, then add the following mapping:
- From the LDAP Attribute column, select E-Mail-Addresses. From the Outgoing Claim Type, type email
- From the LDAP Attribute column, select Given-Name. From the Outgoing Claim Type, type fistName
- From the LDAP Attribute column, select Surname. From the Outgoing Claim Type, type lastName
- From the LDAP Attribute column, select SAM-Account-Name. From the Outgoing Claim Type, type username
- From the LDAP Attribute column, select Token-Groups - Unqualified Names. From the Outgoing Claim Type, type groups
Select Finish to add the rule.
The entries in the Outgoing Claim Type column can be modified. The entries may contain dashes but no spaces. They are used to map the corresponding fields in LogicalDOC.
-
Select Add Rule to create another new rule.
-
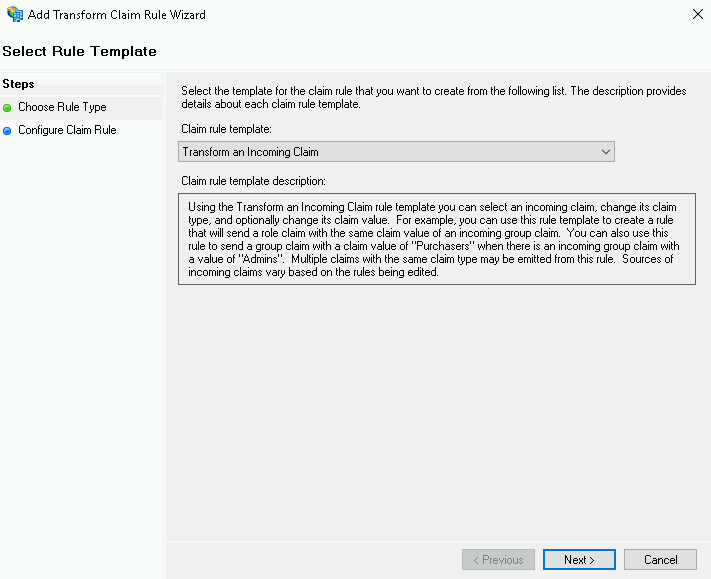
On the Choose Rule Type screen, select Transform an Incoming Claim from the drop-down menu, then select Next.
-
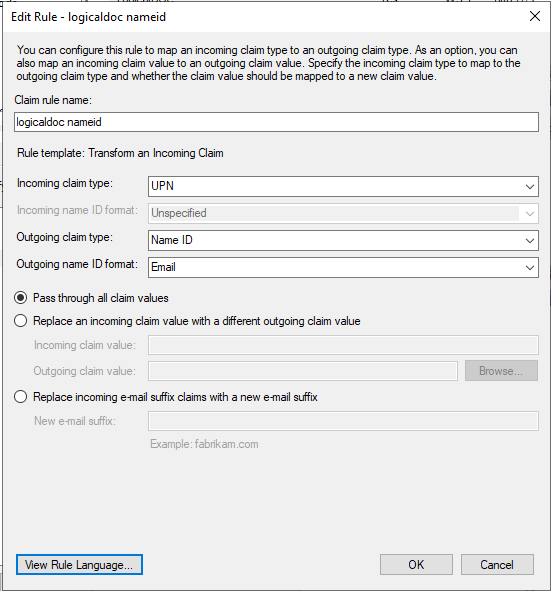
On the Configure Claim Rule screen, enter a Claim Rule Name of your choice, then:
- Select UPN for the Incoming claim type
- Select Name ID for the Outgoing claim type
- Select Email for the Outgoing name ID format
Select Pass through all claim values, then select Finish.
-
Select Finish to create the claim rule, then select OK to finish creating rules.
-
Open Windows PowerShell as an administrator, then run the following command:
Set-ADFSRelyingPartyTrust -TargetName LogicalDOC -SamlResponseSignature "MessageAndAssertion"
where LogicalDOC is the name you specified in step 4 when you added a relying party trust.
This action adds the signature to SAML messages, making verification successful.
Export identity provider metadata
Next, export the identity provider metadata, which will be later uploaded to LogicalDOC to finish SAML configuration.
-
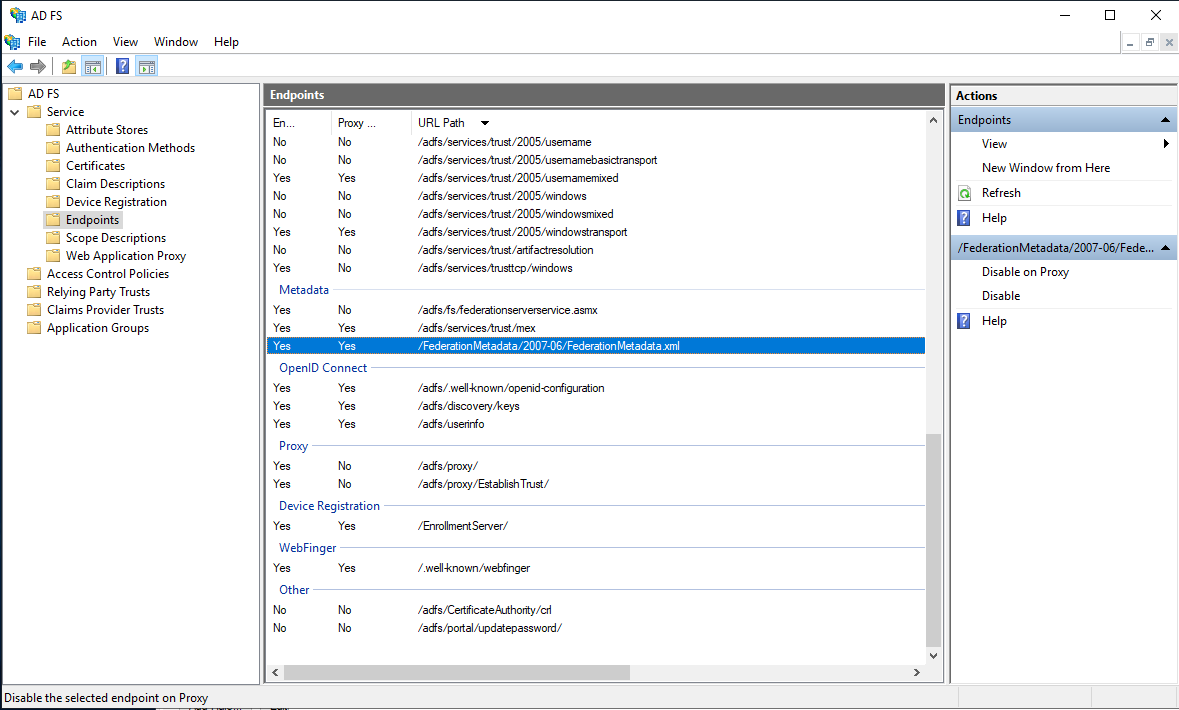
In the left navigation pane, expand AD FS > Service, and then click Endpoints.
-
In the right pane, under Endpoints > Metadata, in the Federation Metadata row, copy the URL path.
For example, copy FederationMetadata/2007-06/FederationMetadata.xml
-
Add the host name of the AD FS computer to the URL path you copied as follows:
https://hostname/FederationMetadata/2007-06/FederationMetadata.xml
-
To retrieve the IdP (identity provider) metadata, in a browser, paste the complete URL.
-
Go to LogicalDOC in Administration > Security > SAML Single Sign-On and upload the Identity Provider Metadata file into the field IdP metadata.
Click on Save button to confirm all.
Test the login
In order to test if all was correctly configured, you may try to initiate a login from LogicalDOC acting as the Service Provider.
- Go to LogicalDOC in Administration > Security > SAML Single Sign-On and copy the link of the Login field (it is the base URL of LogicalDOC followed by /saml/login).
- Open a different browser and paste the URL and you should be redirected to the ADFS login page.
- Here enter the credentials of a user in your Active Directory and you should be logged directly into LogicalDOC.