")
")
")

Before you begin
Before you begin, you need to generate encryption certificates for encrypting the SAML connection and load them in LogicalDOC
- You can use the Bash script from the logicaldoc/scripts repository on GitHub, or any other suitable method.
- Save the two files that are generated. They are the private key and the public key. In the SAML settings panel, they are referred to as the SP Private Key and the SP Certificate respectively.
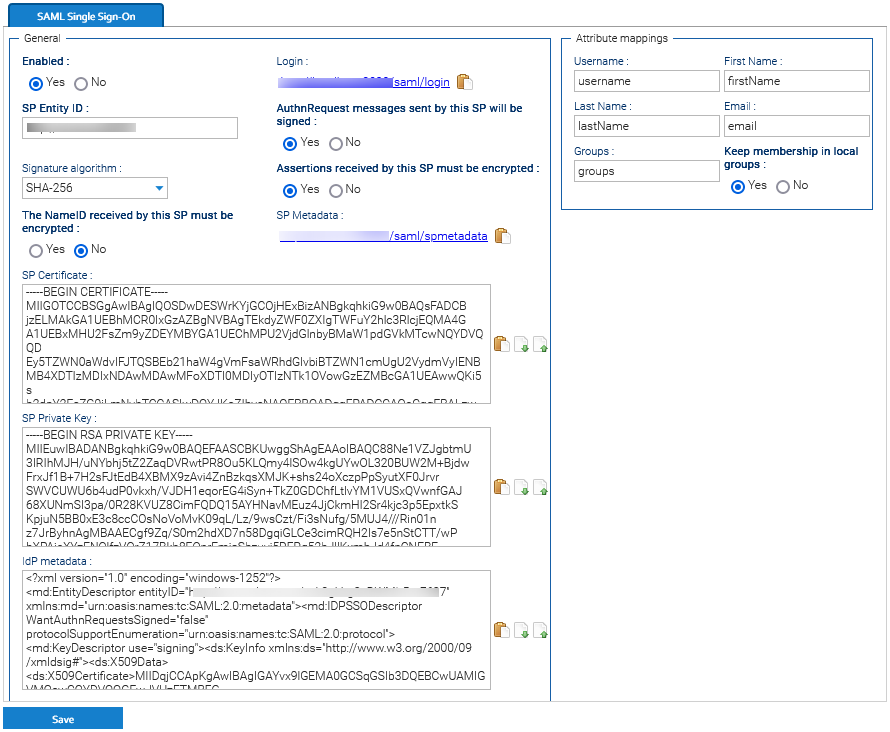
Prepare LogicalDOC
- Enable the SAML Single-sign-on in Administration > Security > SAML Single Sign-On
- In the SP Entity ID field put a unique identifier(you may put here the same URL you normally use to connect to LogicalDOC, eg http://localhost:8080)
- Enable both the signature of the AuthnRequest messages and the encryption of received assertions
- Choose SHA-256 as Signature algorithm
- Upload the SP Certificate and SP Private Key generated at point 2 in the correspondent fields.
- In the Attribute mappings form, prepare following mappings:
- In Username, type username
- In First Name, type firstName
- In Last Name, type lastName
- In Email, type email
- In Groups, type groups
Click on Save to confirm all the configuration.
Now you completed the LogicalDOC's configuration and can approach the setup of Okta.
Set Up a connection app for LogicalDOC Single Sign-On
-
Log in to Okta as an administrator.
-
Go to Applications > Add Application.
-
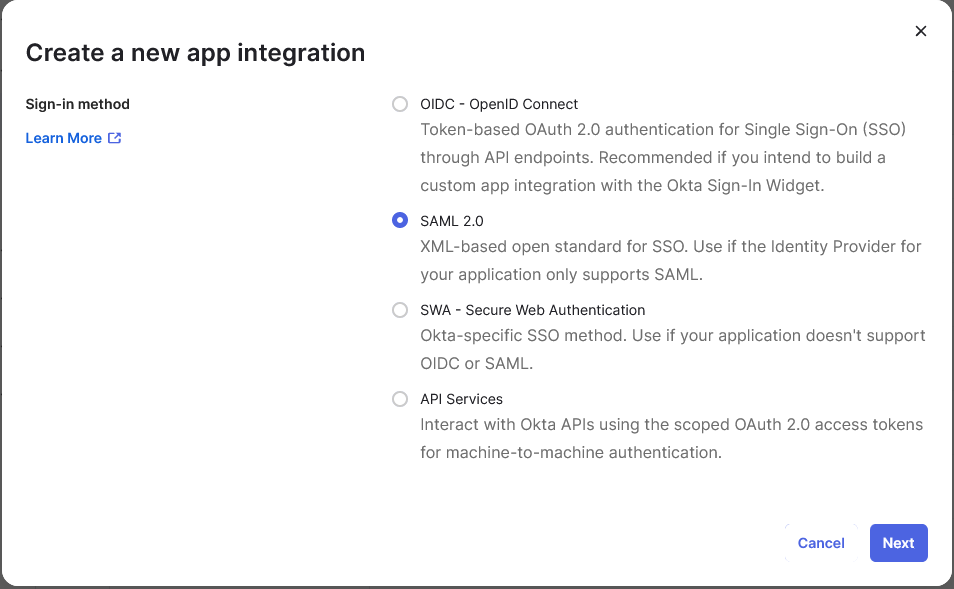
Select Create New App, then choose SAML 2.0 as the Sign-in method.
-
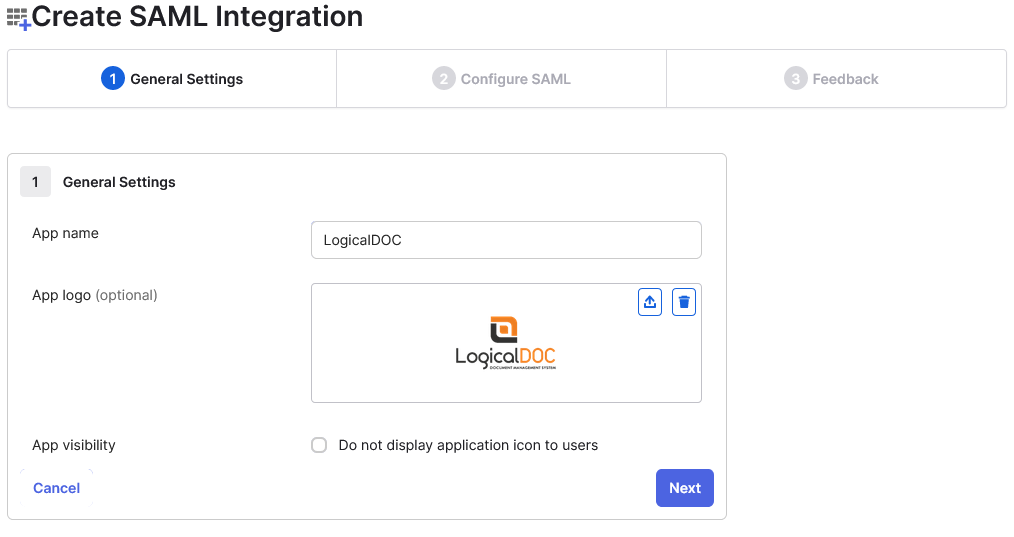
Enter General Settings for the application, including App name and App logo (optional). It’s recommended to display the application icon to users, including in the Okta Mobile app. If you’d like to use a LogicalDOC logo for the application, you can download one from our page.
-
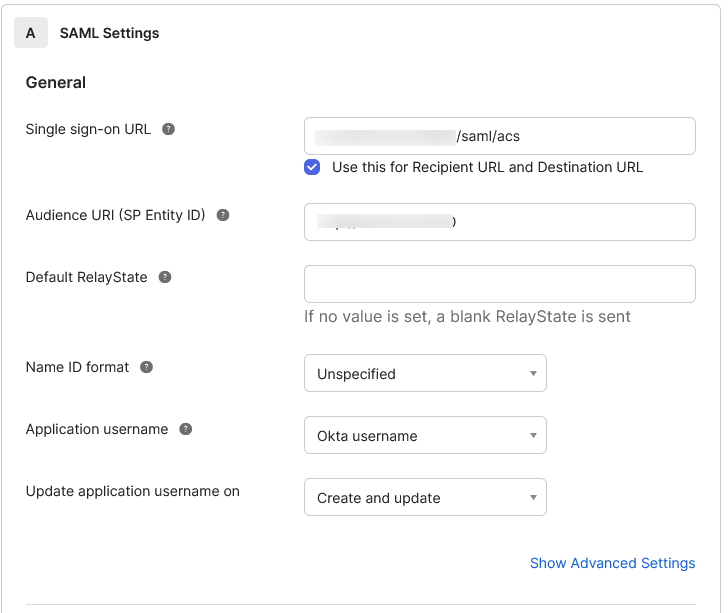
Enter SAML Settings, including:
-
Single sign-on URL: https://your_logicaldoc_url/saml/acs where https://your_logicaldoc_url should typically match the LogicalDOC URL.
-
Audience URI: the identifier you used in step 2 of LogicalDOC's preperation
-
Name ID format: unspecified
-
Application username: Okta username
-
-
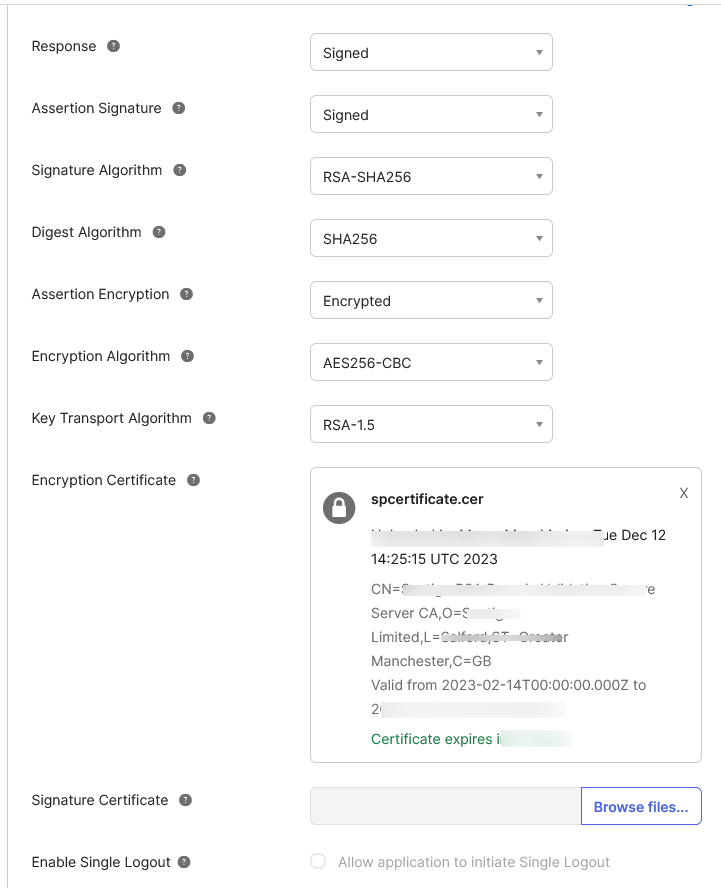
To set up encryption for your SAML connection, select Show Advanced Settings.
-
Set Assertion Encryption as Encrypted, then upload the Service Provider Public Certificate you generated earlier to the SP Certificate field.
-
Enter attribute statements used to map attributes between Okta and LogicalDOC. For more information on which attributes are configurable, see our documentation on SAML configuration settings. Email and username attributes are required.

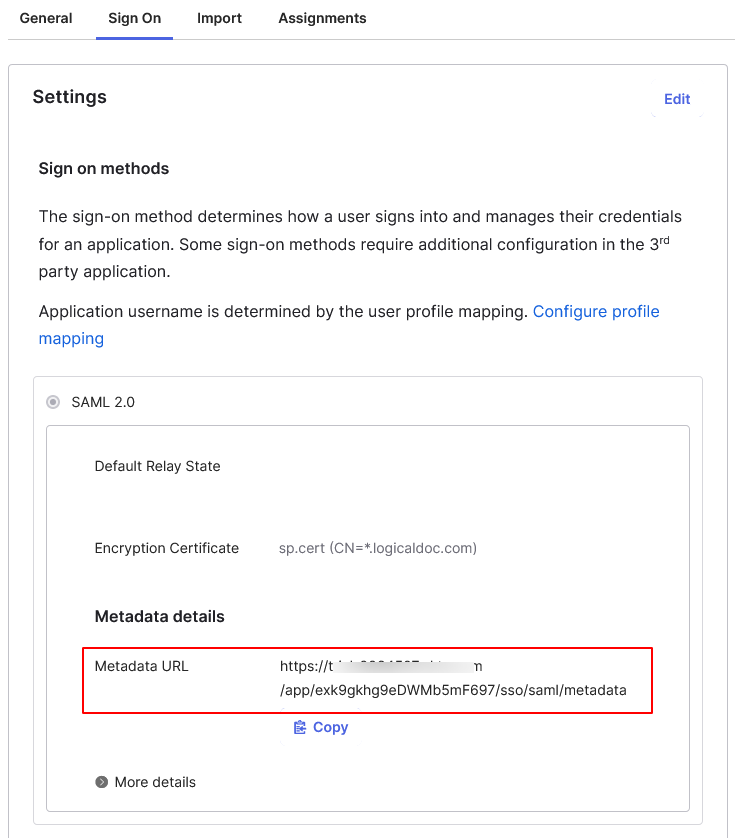
Export identity provider metadata
Next, export the identity provider metadata, which will be later uploaded to LogicalDOC to finish SAML configuration.
-
In Okta go to Applications and here click on the LogicalDOC entry
-
Open the Sign On tab and copy the Metadata URL.
-
To retrieve the IdP (identity provider) metadata, in a browser, paste the complete URL.
-
Go to LogicalDOC in Administration > Security > SAML Single Sign-On and upload the Identity Provider Metadata file into the field IdP metadata.
Click on Save button to confirm all.
Test the login
In order to test if all was correctly configured, you may try to initiate a login from LogicalDOC acting as the Service Provider.
- Go to LogicalDOC in Administration > Security > SAML Single Sign-On and copy the link of the Login field (it is the base URL of LogicalDOC followed by /saml/login).
- Open a different browser and paste the URL and you should be redirected to the Okta login page.
- Here, enter the credentials of a user in your Okta platform, and you should be logged directly into LogicalDOC.